Z Wave light bulb
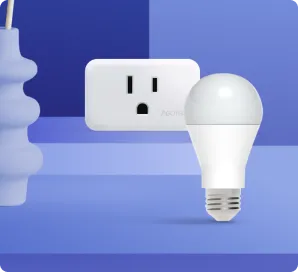
Z-Wave light bulbs offer convenience as you can control them by remote control or hub.
For example, in a utility closet, you may have all appliances and equipment, including water pipes, a furnace, a water meter, a gas line, etc. To turn on your lights in your utility closet, you must pass across all these fittings and fixtures, which can be dangerous.
With a Z Wave light bulb, you won’t have to stumble across your other fittings anymore! A Z Wave light bulb and a door or window sensor come in handy. By pairing your light bulb and the sensor, your bulb will turn on the next time you open the door.
How to Automate Z Wave Bulb
This tutorial teaches you to automate an existing fixture by adding a Z Wave bulb. Automating your lights is a great way to add convenience and comfort to your Vera-controlled home.
Now that your Z Wave bulbs pair with your hub, you can automate them. To start with, you need two devices:
- A door and window sensor
- LED Z Wave-enabled Light Bulb
Start by logging into your Vera UI7 Dashboard and selecting “Add Scene,” then click on ‘select device’ as a trigger. You will see all of your paired devices listed. Click on the drop-down arrow next to the device name to open up a menu and select “Z Wave bulb.”
After clicking create trigger scene, you will be presented with a menu where you can configure your triggers. In this example, we will select “whenever the door and window sensor is opened, whether it’s armed or disarmed.” So anytime you open the door, it will act as a trigger for our case.
Next, click on “validate.” Once satisfied with your settings, click “Next Step.”
Here, we need to tell Vera what action to take when this trigger is activated. Let’s select “Z Wave bulb” from the Device section and then pick our device from the drop-down list. Click ‘Next Step.’ Next, select the state at which the bulb will turn on in, and in our case, select 100%.
Next, we have two options on when the bulb will turn off. We can use the delayed action and wait for a specific time, then click ‘Validate”.
Again, on the device we want to do something, we click on the Z Wave bulb, click next, and then put it in the state we want it to go into. In our case, we tap “off” and ‘validate,’ and this way, it will turn off 15 minutes after you turn it on.
To cap it, we indicate the type of mode we want the scene to run in and then click ‘Done.’ Do we want notifications? Yes. Then name the scene. Then click “Finish.”
If you want lights off when the door is closed, you can use another scene by setting it up the same way as above, except when selecting the trigger. In this case, you will select “whenever door and window sensor is closed, whether it is armed or disarmed.” You will set up the whole scene the same way, except you don’t use the scene of ‘delayed action.’
The whole process is simple!

